
Silvering
Production shops may mirror (or re-mirror) glass on sophisticated assembly lines where the glass travels on endless belts beneath a series of ‘curtains’ of different liquids, producing thousands of square feet of mirror per day with almost no human input. We will be doing the same thing on a much smaller scale and with more elbow grease, but still applying the same chemicals in the same order. In essence, we will be applying a thin layer of pure silver (a mirror) to the surface of the glass, then protecting some areas and dissolving away the silver we don’t want in the final design.
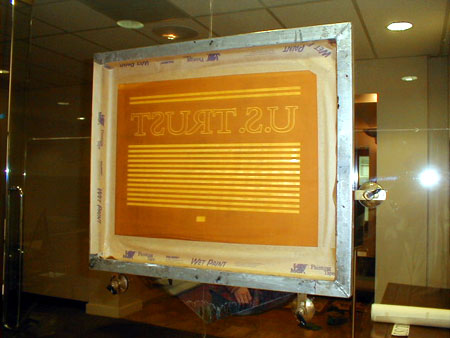
These photos show the procedure involved in producing a two-tone (shiny mirror and satin) silver job on the client's window. Before we left for the site we had mixed the chemicals needed and burned the silkscreen we would use for the image.
Mixing the chemicals
Old books describe how to dissolve silver salts and mix them with other chemicals which react with the dissolved metal to precipitate it out as pure silver. We will be using pre-made chemical concentrates, just diluting them with water and applying them to the glass. The chemicals are pretty stable – I’ve kept jugs for months while I waited to get back to a project – but it is probably a good idea to discard diluted chemicals after a week or so. They’re cheap, so mix fresh.
We start with three solutions of chemicals, A, B & C. They keep better in concentrated form (as well as being cheaper to ship), so that is what you get from the suppliers. “A” has dissolved silver in it and is mixed with “B” to form the actual working silver solution, “A&B”. The third solution “C” just needs to be diluted to working solution “C.” “A&B” smells like ammonia, “C” has no smell (in fact it is just sugar water). The silver concentrates “A” and “B” will react violently with each other, so they need to be diluted before mixing. The dilution is 40:1, so some accuracy is needed to measure the small amounts of liquid, but it’s not critical. I put marks on a plastic gallon jug at 1/2 gallon (64 ounces) and fill most of the way with distilled water. Then pour about 1.5 ounces of concentrate “A” into the water, rinse the measuring cup into the jug, add about 1.5 ounces of “B” and rinse, then add water to the measuring line. Note that the concentrates were never in contact with each other – they only met in the middle of a lot of water. Fill up a squirt bottle with this clear but smelly mix “A&B”.
The sugar “C” also gets diluted to 40:1 with distilled water in another jug. Fill another sprayer with this clear mix “C”.
Tin is mixed by dissolving 1 gram of tin chloride in 2 quarts of water. This ratio is very forgiving – 1 gram can be dissolved in up to 50 quarts of water. Trying to measure tiny amounts is hard, so it’s nice that it be uncritical. Dissolved tin has a short shelf life; it should be mixed fresh every day. Fill a sprayer with this clear mix “TIN”.
In order to remove unwanted silver at the end of the process we dissolve a couple of chemicals in water to make a nice orange liquid. The chemicals contain cyanide (in a very low concentration) and will stain fingers a nice brown, so it is good to wear gloves. Also it seems to corrode metal jar lids. One teaspoon of chemical in X quarts of water will make the orange mix “Silverstrip”, which goes into a glass or plastic jug or a sprayer.
Silvering Supplies
- Silvering Chemicals, usually premixed in two gallon jugs
- Hand sprayers for tin (regular dinky sprayer) and water and the two silvering mixes (high output sprayers)
- Bucket to carry sprayers, can be filled with hot water to warm up chemicals
- 1 mil plastic dropcloth
- Clear 2" box tape - Scotch has a heavy version
- Paper towels, a roll is good
- Standard canvas dropcloths
Silkscreening Supplies
- Film positive, silkscreen, squeegees
- Suction cups or wood blocks and doublefaced tape
- Ink (We usually use DecorGloss black or white, not blue; most inks should work)
- Pumice mixture and felt block for cleaning glass
- Can of spray window cleaner
- Usual rags and newpaper and solvents to clean screen
Chemicals may be ordered from:
- Esoteric Sign Supply: 1646 Wilmington Blvd, Wilmington, CA 90749
Rediscoveror of the system for spraying gold (“angel gilding”) as well as supplier of most of the wierd materials that glass signs can use. Reformulated DecorGloss inks as Fine Gold Backup Ink. (310) 549-6622 - Peacock Company: Patented (in 1940) the spray silvering system we are using. Also supply glass drills and other mirroring stuff. (215) 729-4400
- CR Laurence Co: Big, national glass materials supplier. Can sell you a whole 50’ mirror conveyor machine if you’d like one. (800) 421-6144
- Sommer and Maca Co: Ditto but a bit smaller than CRL. (800) 323-9200
Locating
Once on site we tape the film positive to the outside of the glass in the location we want the sign to go. Now is a good time to double check your measurements andttttor scrutinize the way things look, because once you start you have only a few inches of movement for adjustments. Sometimes moving the film pos a bit will suddenly look much better... Tape the film pos to the window and move to the inside of the glass.
Draping
Now you know where you will be spraying silver, but it is a messy process and the chemicals will stain painted surfaces. You will of course have a good dropcloth on the ground, but we need to protect the surroundings on both sides and above from the dreaded overspray. Cheap clear plastic dropclothes work well for draping, they even stick themselves to the glass with their own static. Eventully you get them untangled and cut to appropriate size and taped around the window and mouldings. With a fresh razorblade and little pressure, cut a "window" out of the plastic, going at least 3" over on both sides and above, and tapering down to a point. Tape this to the glass carefully – I use clear 'box' tape so I can see that I'm making a good seal to both the glass and the plastic. Try to work from the bottom up so the tape overlaps will tend to drain off, use long strips of tape, and if in doubt put another strip of tape over. At the bottom the drape will feed the liquids into a plastic bucket, I arrange some wood dowels in the bucket to make a gentle watershed with no places to puddle and possibly spill.
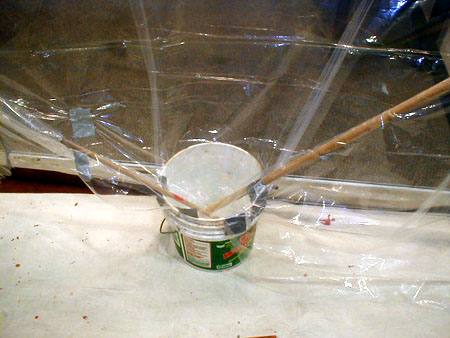
Drain the liquids into a plastic bucket

Taped watershed with no place for puddles
Cleaning
Now you're ready for the most critical part of the job, cleaning the glass. Cleanliness is extremely important. Bits of grease, fingerprints – almost any contaminate will affect the silvering. Especially if the glass is old or has been gluechipped, work to get to an essentially ‘chemically clean’ condition. (If you are used to prepping glass for gold-leafing you will be familiar with the importance of ‘clean,’ but silvering is many times more sensitive than the gold-leaf process.) Rather than just use soaps or detergents, we will actually polish away some of the glass to expose a new clean surface. The new surface will have tiny scratches in it which are not visible to our eyes but seem to help the silver’s adhesion. (If you wish to chemically deposit gold (“angel gilding”) the use of a 3 micron abrasive which leaves a certain size of scratch seems to be even more important.) We will be using a very standard, cheap material – 4F pumice in a detergent slurry – and polishing by hand.
We carry a bottle of pumice mixed in detergent water in our screen kit and use it to clean glass for any type of window painting or gold leaf. Squirt a teaspoon of milky pumice slurry on a felt block and scrub the glass – imagine that you are grinding the top layer off and work up a sweat.
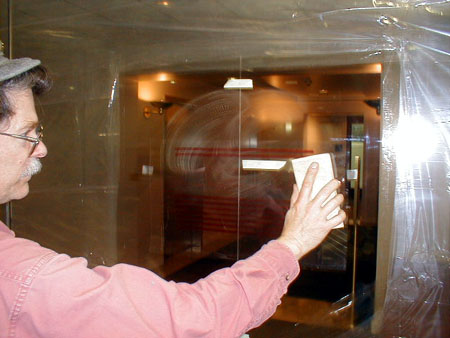
Clean glass is essential for any type of window painting or gold leaf
What? don't have a felt block? Something a little firmer than a blackboard eraser is best, but a wood 2x4 wrapped in teeshirt will do. You just want to have something to hold onto to scrub, and scrub you do. Cover your scrubber with a clean paper towel (if you have a felt block yoiu can turn it over and use the back side( and rub off the pumice – show a little vigor, cause it sticks pretty well to the glass and even a smidge of pumice will show under the mirror. Good, now do it again. After the second scrub and rub-off use a new paper towel and window spray, rubbing from the center out. Maybe do this twice too, it's really hard to see the pumice grains. Be careful that you're not grinding pumice into the top edge of tape where it may drip down when we spray.
Test your surface by spraying clear water over the area and see if it forms an even sheet. If it won't, or breaks up in a second or two, it will show where the contaminants are. Try another hit of window spray, if that doesn't work go back to pumice. It's got to be clean.
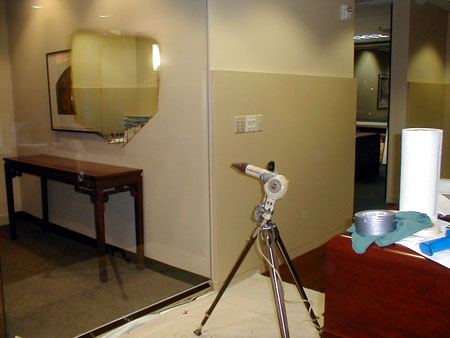
Tinning
Mirroring can be done on a plain, clean glass surface, but a monomolecular layer of tin improves the process. The tin compound is dissolved in water and sprayed over the clean glass surface, left to sit for about 2 minutes and then rinsed off. What remains bonded to the surface is invisible but somehow helps the silver to settle on the glass. For even coverage it helps to start spraying at the bottom of the glass and work up.
Silvering
After rinsing the tin with water, spray with both squirt bottles to coat the glass with approximately equal amounts of A&B and C. Get the first layer on fast and even (start at the bottom) because if it goes on spotty it may show in the final mirror. Once the first layer is on you can take your time, spraying a little from both guns at a time. In a few minutes (depending on temperature) the glass will start to get cloudy and then silvery. One test for coverage is to look through the silver at a lightbulb and keep mirroring until the light is barely visible (it turns a nice purple color before it disappears). After a certain point all you get is whitish crystals of silver, not a thicker mirror.(no picture)
Once the mirroring is complete, rinse off the silver. It’s not likely, but if the chemicals were to dry and form crystals the crystals could explode. So do a good rinse over the silver and then spray the colored drops hanging in the folds of the plastic, trying to rinse all the chemicals into the bucket. Pull down the drape carefully and stuff it all into the bucket. Dry well – either in front of a fan or roll the paper towel roll gently over the surface. It is important to get rid of all the moisture in the silver or it will tarnish later.
All moisture must be removed from the silver
Backing Up
This is done in a number of ways. Anything that will repel water and not tarnish the silver will work – silkscreen ink, most lettering enamels, even a felt tip pen with solvent ink. But some paints will tarnish silver, so test first. One varnish that I like and use for gold leaf - Chromatic’s Overcoat Clear - turns the silver to purple in a few hours, other varnishes are okay years later. One of the nifty things about mirror is that we will be removing it by dissolving, not by rubbing (as we do with leaf), so you can back up with a halftone image and still keep the tiny dots. On this job we have simple lettering, so we use DecorGloss quick drying silkscreen ink, black and white mixed to a grey that the designer prefers to seeing black from the inside.
Registering
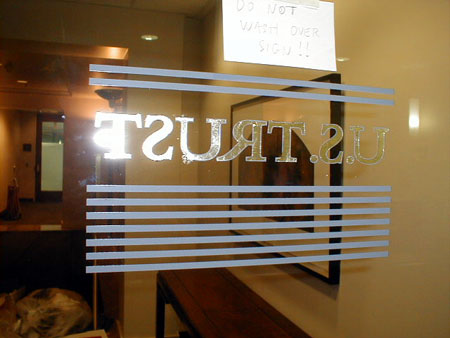
Carefully tape the film positive over the silver. You may push on the film without scratching the silver, but try to avoid rubbing it sideways. I like to use a bubble level to check that the image is properly placed.
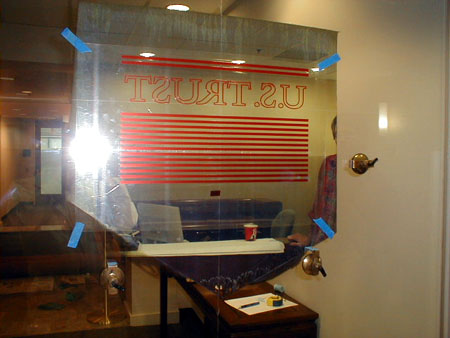
Film positive placed over the silver
Now registering your silkscreen to the film pos is easy. We use small suction cups to hold the screen in place, but wood blocks and tape will do. A few spots of double-faced tape at the corners of the screen will provide off-contact and help keep the screen from slipping.
Register your silkscreen to the film positive
Printing
Printing is the same as any vertical print job – keep an even pressure, watch out for drips from the squeegee, don't pull the screen down until you look for wet spots in the image that didn't print, and please remember to take the film pos down before you print. I like to have an area in the stairway or sidewalk set up for cleaning the screen – with DecorGloss you will need lacquer thinner. Clean the screen, then inspect the print carefully and cover any open areas with thinned DG from a brush. Remember that the stripper will dissolve silver from any unprotected spots.
Print on Silver
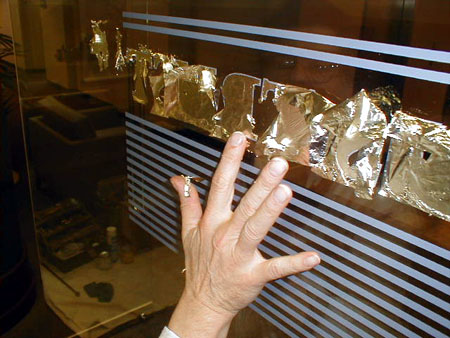
De-Silver
The silverstrip liquid is repelled by any grease in the back-up paint so it won’t dissolve underneath the back-up, meaning you don’t need to worry about how long you leave the stripper on. When working upright I find a foam brush is helpful to brush the silverstrip up and get silver hiding at the bottom of letters or in small counters. Spraying works fine but you’ll be breathing a cyanide solution. Strip all the silver, leaving only the areas protected by ink. Now would be a good time to still have the drape up, but by using a foam brush and a handful of paper towels and going slowly I usually get by. Or you can set up a little drip catcher with a small piece of the plastic drape. The silverstrip will also stain fingers and painted surfaces. After all is de-silvered, rinse with fresh water, probably a couple of times until the water drips don't show color. Roll the paper towel roll over to dry off. There always seems to be a little bit of haze where the silver was – it rubs off easily but you'd rather not rub over fresh ink. If possible let the print dry overnight and clean the haze with cotton and window cleaner; if you can't wait it usually isn't noticeable.
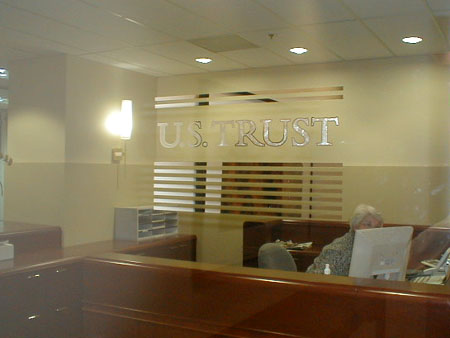
Two Tone
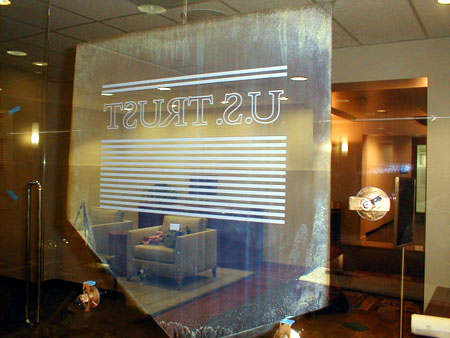
After de-silvering the design may be complete. The silver image is done, but it can tarnish from the edges. The mirror itself is extremely scratch-resistant, but it may go dark where the back-up paint is scratched. So (like a goldleaf job) it is best to protect the image, either with varnish or paint or vinyl. Some varnishes (particularly Chromatic Overcoat Clear, an otherwise excellent clearcoat) will react with the silver, but most seem okay. If the varnish solvent is not too hot, and the DecorGloss gets an hour to cure, one can brush or screen on an overvarnish extending a little way over the edges and be done. In this case we are doing a matte center, so we let the de-silvered image sit overnight – at this point it looks quite pretty and twinkly – and came back the next day. Now the ink is hard, you can clean off the bit of haze around the image with cotton and spit or spray-on cleaner.
Sizing Centers
With a small brush and some quick-size (and maybe some aids to vision) brush in the centers of the letters, looking back after each letter to spy holidays in the letter before. Remember to put down test patches on the glass where you can feel as the size tacks up.
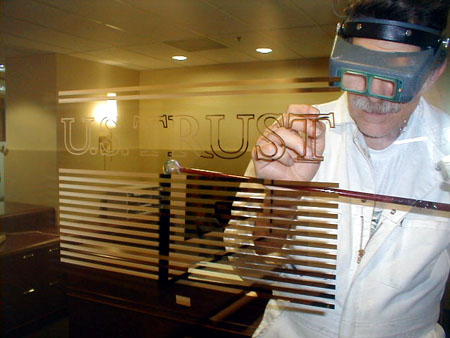
Brushing quick-size into center of letters
Laying Leaf
When the size is sticky – not as dry as for a surface gild, we want it to be dull – lay leaf from the book.
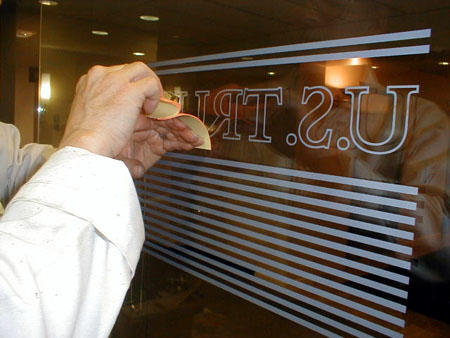
A smooth but quick motion lays the leaf on the size
In this case we are using 12 karat white gold because silver will tarnish when laid on oil size. One could use gold or varigated or color, in fact silver outline with black center looks very hip. After the leaf is laid it must be pressed into the size. This is always a sad time, because the leaf looks great when it is all crumpled and sitting on the size. But if you don't make good contact you risk having the leaf fall off in some areas, a depressing option. For pressing the leaf I prefer to tap gently with my finger or the heel of my hand, going over the area once carefully and then a second time with a bit more pressure and a slight sideways slide or twist which pulls leaf off the edges of the letters. There are usually a few holidays but they are easy to dot with size and stick a bit of leaf in.
Tap down gently, but try to make solid contact
Gilded, cleaned, ready for backing up
Backing Up
At this point you could overvarnish and have a metal look from both sides. Usually there are tiny holes or cracks in the gold which won't show from the front but will let light through from the inside. In office environments sometimes the lighting is almost the same on both sides, ugh. I like to cover the matte centers with OneShot metallic silver or gold to make them opaque, especially if a black shade is going over because the black will find every pinhole and bleed through. Here we just covered the back with grey.
And since the designer didn't want a shade or color, all there was to do was to overvarnish the whole thing (as Ray LeBlanc says, keep the varnish close to the edge, it protects better), sign it and make sure the front of the glass is clean. You don't want your client to see a dirty sign, do you?
Finished gild